Mmap Creation of New Mapping
| ✅ Paper Type: Free Essay | ✅ Subject: Computer Science |
| ✅ Wordcount: 1549 words | ✅ Published: 18 Aug 2017 |

The goal of this experiment is too understand how mmap creates a new mapping on a process virtual memory address space.
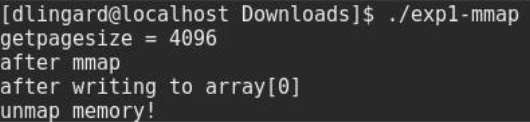
Figure 1
The outcome of the program is shown (figure 1). The page size of this architecture is equal to 4096 bytes, which is the default page size for most modern operating systems.
The program threw a segmentation core dump error the first time it was ran but after editing the C program it ran as expected. The code altered is shown below, this code had to be changed as the program wouldn’t have the permissions to write memory which renders this program useless
Code before:
Array = mmap (Null, alloc_size, PROT_READ, MAP_PRIVATE, fd, 0)
Code After:
Array = mmap (Null, alloc_size, PROT_READ | PROT WRITE, MAP_PRIVATE, fd, 0)


This segment of code(Figure 2) writes to the first page of the allocated area at the position of zero, if this was changed to something larger than the size of page size (4096 bytes) then the program would return a segmentation fault.
Tutorial 1 – Exercise 2
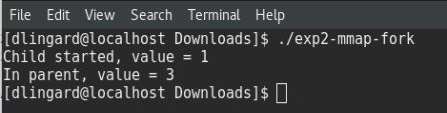

 The concept in this experiment has shown how to create a mapped memory region then use the fork() process to create a child process in which shares the same memory region as its parent. The fork() process creates a new process by duplicating the calling process. (Manual, 2016)

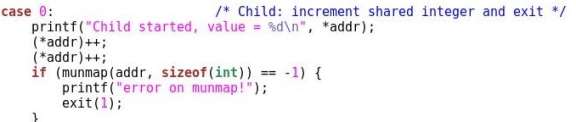
Above (Figure 3) is a segment of code from the program used to show how to create a memory mapped area between shared processes. In this segment the child process increments the shared integer (*addr) twice, meaning when the integers value is printed again in the parent process it will be equal to three (Figure 4).
The program waits for the child process until it prints to the user the value of the parent and unmmaps. The wait() system call suspends execution of the calling process until one of its children terminates, on success returns the process ID of the terminated child (Manual, wait(), 2016);
Tutorial 1 -Exercise 3
The goal of this exercise to understand memory management through a program that uses the device memory(/dev/mem). /dev/mem is character device file that is an image of the main memory of the computer. Depending on the user’s permission level, the program must be run as root otherwise the program cannot access the main memory (Figure 5).


When the program is run as root user (Figure 6) a list of memory addresses is printed to the user. These addresses in /dev/mem are interpreted as physical memory addresses. References to nonexistent locations can cause errors. (Manual, MEM(4), 2015)
Tutorial 1 – Exercise 4
The concept of the experiment is reducing memory footprint through the dynamical access of executables and memory addressing.

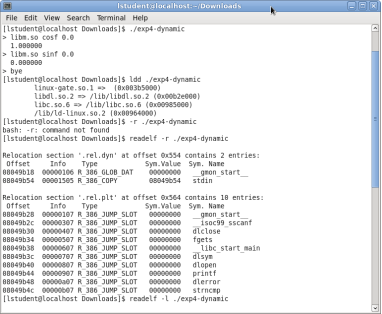
Linux incorporates the use of shared libraries within its operating systems, a lot of Linux programs use the same standard functions such as screen support or file access, for a programmer to include these functions in every program it would cause program files to be unnecessarily large. The advantage of having these libraries is that a library only needs to be loaded once for several programs to use it; resulting in saving RAM and hard disk space. (Kofler, 1998)
Tutorial 2 – Exercise 1
The concept of the experiment is to understand how mmap uses a file as part of the address space. The program used in this experiment is an emulation of how the Operating system extends RAM to a file.


The program being used in this experiment uses a file called test.txt as RAM, the file itself is equivalent to one page size of the given architecture. The program then writes to the page with a char at the array position of zero to four(Figure 9).

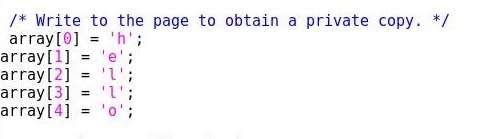
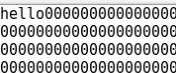
This is an example of how a memory mapped file is taken from disk and placed into memory explicitly for reading/writing and will stay there until the user unmaps it. This experiment shows that when writing to ram you’re writing to a file.
Tutorial 2 -Exercise 2
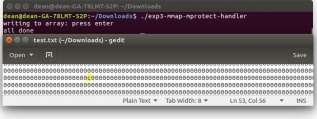
The goal of this experiment is too understand that Mprotect can change permissions of mapped areas.

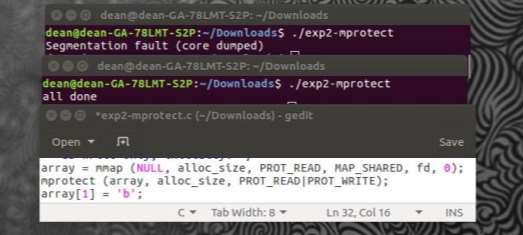
After using the Mmap function within the program (FIGURE 10(Gedit)) the permissions set are read only, meaning that the program wouldn’t be able to write to the array. After memory has been mapped, the permissions originally set can be modified with the Mprotect system call. If a program attempts to perform an operation on a memory location that is not permitted, it is terminated with a segmentation fault(FIGURE 10(Top terminal)). (Mitchell, 2001)
Tutorial 2 -Exercise 3
The goal of this experiment is to understand how the operating system manages protections dynamically.

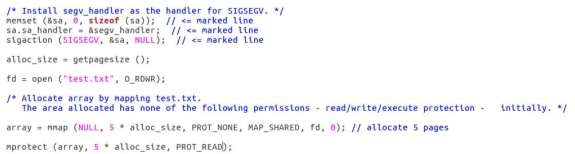
(FIGURE 11) is a segment of code taken from the experiment, it shows a handler for the segmentation fault. This code is in place to take care of the segmentation fault, the problem with the above code is the fact that this is an infinite loop, the segmentation error is given when attempts to perform an operation on a memory location that is not permitted, meaning that the code will continue at the point the signal occurred, creating an infinite loop. The solution to this is to change the permissions within the Mprotect system call allowing the ability to write as well as read.

Tutorial 2 – Exercise 4
The goal of this experiment is to understand how the operating system manages protections dynamically.


As opposed to the previous experiment, this program changes the permissions of the page that is being accessed using Mprotect. The handler is in place to ensure that an infinite loop doesn’t happen like in the previous experiment. With the permissions being set within the handler itself, the handler will be able to completely handle the error resulting in no segmentation error stopping the program.
Tutorial 3 – Exercise 1
The goal of this research is to understand that each file in Linux has a respective Inode.
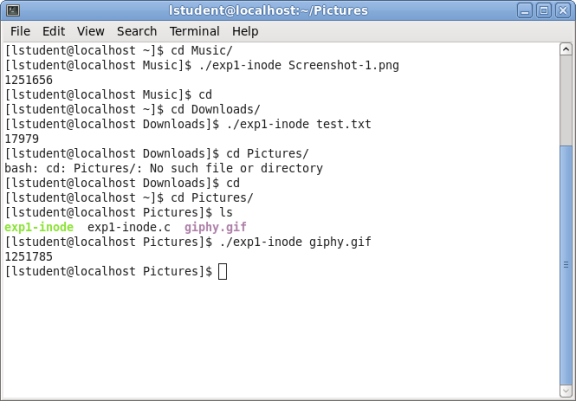
Figure 14
The results of this experiment (Figure 14) show the Inode’s for 3 separate files in 3 separate directories, the Inode is a data structure in a Unix file system to describe an object like a file or a directory. The Inode is a pointer with a the Inode number being unique, if a file is moved then its Inode number will also change.
When an application needs a file, the application exchanges the file name for the Inode number from the directory listing, after that the application uses the Inode for a reference to the file.
Tutorial 3 -Exercise 2


 The goal of this experiment is to understand some system calls that manipulate files and directories.
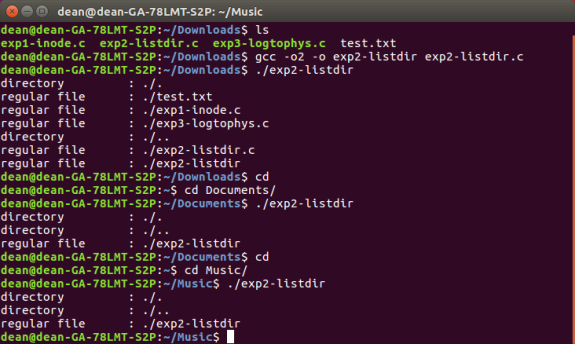
(figure 15) Shows the files and directories of several locations using a program which snippet is shown (figure 16). This program returns a list of what is in the present working directory, notice that the type of the file is shown on the left of (figure x). The system call lstat returns information about a file, in this case it is returning the type of the file.
Tutorial 3 – Exercise 3
The goal of this experiment is to understand how a logical mapping (file) is related to its physical one.

Figure 17
The program used in this experiment determines the number of blocks associated with the given file and maps it’s logical and physical addressing, as can be seen in (figure 17). This is achieved using the stat system call which returns information about a file, for this exercise the only information required from stat is the number of blocks used by the file.

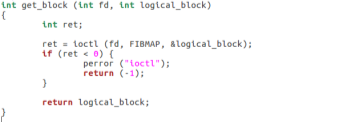
Another system call used in this program is ioctl, used on a file descriptor “fd”. The ioctl function allows the user to manipulate the underlying device parameters (manuals, 2016). Using ioctl with FIBMAP allows the user to return the physical block mapping to its logical mapping.
Tutorial 3 – Exercise 4
The goal of this
Tutorial 4 – Exercise 1
The goal of this experiment is to understand the process of exchanging messages between client and server using blocking communication.

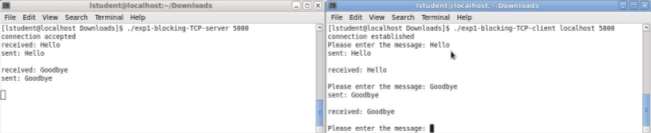
Two programs were used in this experiment, a server program (Figure 20 left) and a client program (figure 20 right). Running on separate terminals the programs communicate with each other, if another client program were to try and connect to the server program the messages wouldn’t arrive at the server, this happens because of “blocking”. When blocking is in use, control isn’t returned to the server program until at least one byte of data is read from the client program (Klement, 2002).
By default, sockets are set to blocking, if a socket call is issued that can’t be completed immediately then the process is put to sleep, waiting for the condition to be true.
Tutorial 4 – Exercise 2
The goal of this experiment is to understand the process of exchanging messages between client and server using non-blocking communication.
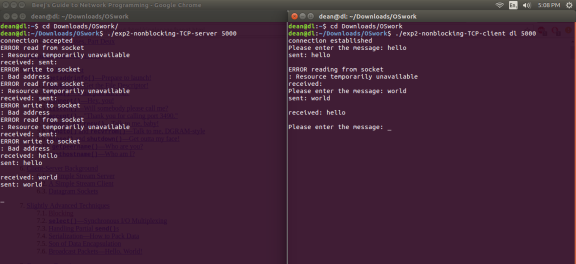
Figure 21
As opposed to the previous experiment, the client and server programs are now using non-blocking sockets. As a default when a socket is created, it’s set to blocking. If the input operation cannot be satisfied with at least 1 byte of data* then a return is made immediately with an error (Figure 21 left) (Stevens, 2001).
*(This applies to TCP, For a UDP socket it would be a complete datagram).
Tutorial 4 – Exercise 3

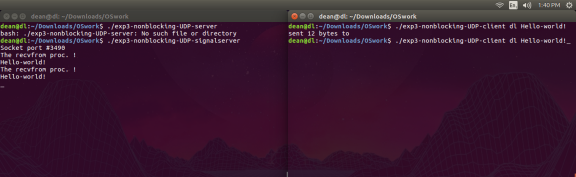 The goal of this experiment is too understanding the basic process of exchanging messages between client and signal-driven server using non-blocking communication.
Tutorial 4 – Exercise 4
The goal of this experiment is to gain a better understanding about the differences between blocking and unblocking programs
Cite This Work
To export a reference to this article please select a referencing stye below:
Related Services
View all


DMCA / Removal Request
If you are the original writer of this essay and no longer wish to have your work published on UKEssays.com then please click the following link to email our support team:
Request essay removal