Design and Quality Checks of pH Meter
Info: 10945 words (44 pages) Dissertation
Published: 16th Dec 2019
Tagged: Chemistry
Chemical laboratory Analysis
Assignment 1- Technical SOPS (Instruments)
pH meter
Conductivity meter
ISE Meter
Turbidity Meter
INDEX
1.Purpose and applications………………………3
2.Types of PH meter………………………………3
3.Equipment………………………………………..4
4.Design of PH meter……………………………..4
5.Procedure………………………………………..5
6.Quality assurance……………………………….6
7.Quality control……………………………………6
8.Precautions………………………………………6
9.Personal protective equipment…………………7
10.References……………………………………..8
APPLICATIONS OF PH METER
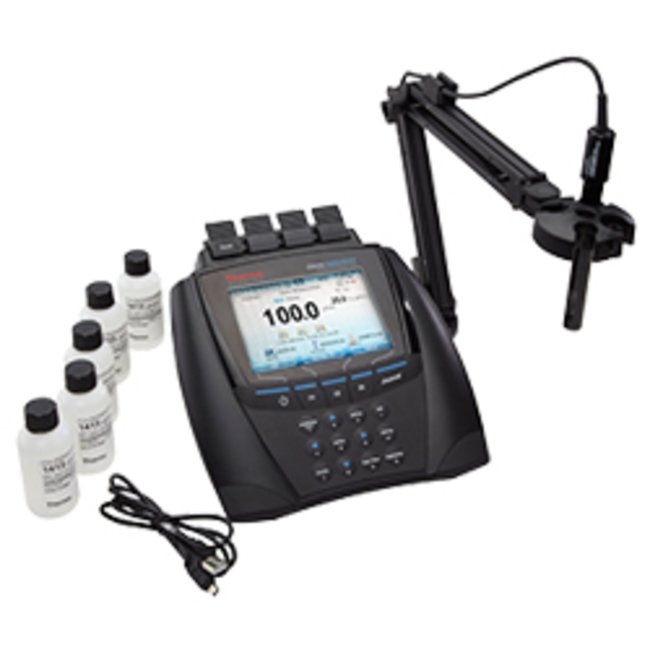
PURPOSE– PH meter is an electric device used to detect hydrogen-ion activity in the solution. A pH meter consists of a voltmeter attached to two electrodes. The pH-responsive electrode which is made up of glass, and the reference is usually calomel electrode. Both electrodes act as battery when immersed in the solution. The glass electrode develops a charge that is directly related to the hydrogen-ion activity in the solution and the pH meter measures the potential difference between the glass and reference electrodes.
- It is useful to know the acidity of the water, typically measured by means of a pH meter.
- Knowledge of PH meter is useful in chemical laboratory analysis.
- It is also useful for soil measurements like in agriculture.
- It also measures the water quality for municipal water supplies, environmental remediation.
- It has healthcare and clinical applications such as blood chemistry.
- They are mostly used in food & beverages, pharmaceuticals, mining and other industries.
Advances in the instrumentation increases the number of applications in which pH measurements can be conducted. Moreover, specially designed electrodes are available in the market to detect the pH of semi-solid substances or liquids such as foods.
KINDS OF pH METER
pH meter are available in three forms;
- Pocket – sized testers: cheap and close-packed for practice, complimentary readings.
- Handheld portable meters: offer data logging and solidity characteristics and give pH accuracy, constructing laboratories.
- Benchtop meters: provide the accurate results, more strong data management, and security choices for stationary lab applications.
Majority of the pH detective systems have standard electrodes with glass bulbs made from pH-sensitive.
| Lambton College | ||
| Chemical Laboratory | ||
| PH meter | Date: 28 feb, 2018 | Page 4 |
EQUIPMENT
- pH meter with electrode.
- Pure water (e.g. deionized)
- pH calibration buffers (e.g. pH 4.01, 7.01, 10.01)
- pH electrode cleaning solution
- pH electrode storage solution
- Beakers
- Magnetic stir plate and stir bars
DESIGN OF pH METER
The sketch of the electrodes is rod-like, with a bulb having the sensing element at the lowest part. The glass electrode for detecting the pH has a bulb made up of glass designs particularly for hydrogen-ion concentration. When we immersed the glass electrode in the solution which is we need to test, then the positively charged ions on glass bulb starts exchanging with hydrogen ions in the test solution and make an electrochemical potential around the bulb.
The reference electrode is not sensitive to the pH of the solution, made up of a metallic conductor, attached to the display. The metallic conductor is then dipped in an electrolyte solution, encounters the test solution through a membrane which is porous. The display has a voltmeter, which provides voltage in form of Ph.
When glass and reference electrode are poured in the test solution, an electric circuit is completed. Then potential difference is created and discovered by the device which is called voltmeter.
For understandability, majority of pH meters use a combination probe, constructed with the glass electrode and the reference electrode having a single probe.
The pH meter is calibrated with solutions of known pH before using every time, to make sure the accuracy of readings. The electrodes are used as probes, which are immersed in the test solutions to quantify the pH of a solution.
| Lambton College | ||
| Chemical Laboratory | ||
| PH meter | Date: 28 feb, 2018 | Page 5 |
The immersion takes place for a long time because of the equilibration of hydrogen ions in the test solution with the ions on surface of the bulb of the glass electrode. This equilibration gives an accurate or best reading of pH.
METHOD
Before we start measurement with PH meter we need to set up. The steps of set up the device are as following:
The first step is:
Electrode preparation:
- First, remove the protective cap from the electrode.
- check the electrode if any scratches or cracks. If cracks are there, then replace it.
- shake the electrode down to remove any air bubbles inside the bulb.
- Rinse electrode with pure water to remove any impurities.
The next step is:
Calibration:
- Fill the beaker with PH calibration buffer to cover the electrode junction.
- Place the electrode in the beaker which contains PH calibration buffer and stir.
- Confirm the calibration point when the reading is stable.
- Repeat for additional calibration points. Be sure to rinse with pure water between calibration points. At least two calibration points were recommended.
MEASUREMENT OF LIQUID SAMPLE
- Rinse the electrode with pure water.
- Immerse the tip in the sample and stir gently.
- Wait until the reading is stable then take the readings.
- Then rinse the electrode with pure water.
- Repeat this procedure for additional samples.
| Lambton College | ||
| Chemical Laboratory | ||
| PH meter | Date: 28 feb, 2018 | Page 6 |
ELECTRODE CLEANING
- Fill a 100 ml beaker with approximately 75ml cleaning solution.
- Place the PH electrode into the cleaning solution for at least 15 minutes, making sure the junction is covered.
QUALITY ASSURANCE
Quality assurance is an essential part of a research study. The purpose of any QA plan is to ensure that valid and reliable procedures are used in collecting and processing research data. The procedures outlined are designed to eliminate or reduce errors in experiments, sample preparation and handling, and analytical methods. The Quality Assurance workers will calibrate the pH meter every time before use and record the date when calibration occurs and corrective action are taken, on the pH Meter Calibration Log. .
QUALITY CONTROL
Quality control (QC) checks are used to review the quality of production, processes and competence. It is essential to continuously test and challenge these aspects to ensure and maintain the highest quality process as possible. For pH measurement, performing a QC check allows you to have an additional check on the electrode after calibration to ensure the calibration was successful.
PRECAUTIONS
- . While using stirrers, make sure to maintain distance between meter bulb and the magnetic stirrer to prevent accidental breakage.
- A hot magnetic stirrer never be used because it can change the temperature of the solution.
- Never keep the electrode in hydrofluoric solution as it can highly damage the electrode.
| Lambton College | ||
| Chemical Laboratory | ||
| PH meter | Date: 28 feb, 2018 | Page 7 |
- During inter-or intra laboratory transportation, handle the instrument carefully to prevent from breakage.
PERSONAL PROTECTIVE EQUIPMENT
- Safety glasses.
- Safety gloves.
- Lab coat.
- Proper footwear.
- Tie hairs back
| Lambton College | ||
| Chemical Laboratory | ||
| PH meter | Date: 28 feb, 2018 | Page 8 |
REFRENCES
- “PH meter”. Encyclopedia Britannica online. 2016
- https://en.wikipedia.org/wiki/PH_meter#cite_ref-EB_2-0
- https://www.pharmaguideline.com/2011/01/sop-for-operation-and-calibration-of-ph.html
| Lambton College | ||
| Chemical Laboratory | ||
| Conductivity meter | Date: 28 feb, 2018 | Page 9 |
INDEX
- PURPOSE…………………………………………………………………10
- SCOPE AND APPLICATIONS………………………………………….10
- EQUIPMENTS…………………………………………………………….11
- PPE…………………………………………………………………………11
- PROCEDURE…………………………………………………………….12-13
- INTERFERENCES……………………………………………………….13
- QC/QA………………………………………………………………………14
- REAGENT AND STANDARS…………………………………………….15
- SAFETY…………………………………………………………………….15
- METER PROBE AND STORAGE……………………………………….15
- EDUCATION AND TRAINING………………………………………….16
- REFRENCES………………………………………………………………16
| Lambton College | ||
| Chemical Laboratory | ||
| Conductivity meter | Date: 28 feb, 2018 | Page 10 |
- PURPOSE
This standard operating procedure (SOP) describes procedures that will be used to calibrate the conductivity meter and measure of specific conductance. This SOP describes field measurement procedures, personnel responsibilities and qualifications, and quality assurance/quality control (QA/QC) procedures.
- SCOPE AND APPLICATION
Conductivity (or specific conductance) of an electrolyte solution is a measure of its ability to conduct electricity. Conductivity measurements are generally made in aqueous solutions, and the ions are from electrolytes dissolved in the water. Conductivity is measured by applying an alternating electrical current (I) to two electrodes immersed in a solution and measuring the resulting voltage (V). It is the reciprocal of resistance. The SI unit of electrical resistance is the ohm (Ω), while electrical conductance is measured in siemens (S). 1 S = 1/Ω the unit of measurement for conductivity is also often expressed in either micro Siemens (µS/cm) or micromhos (µmho/cm). The conductivity units represent the reciprocal of the unit of resistance, the ohm During this process, the solution acts as an electrical conductor and the cations migrate to the negative electrode, the anions to the positive electrode.
CONDUCTIVITY METER
Conductivity meters are used in pipelines, channels, flowing streams and lakes. Use an instrument capable of measuring conductivity with an error not exceeding 1% or 1 uhm/cm, whichever is greater. Use a thermometer capable of being read to the nearest 0.1 0C. There are 2 types of electrodes come with conductivity cells, platinum electrode and non-platinum electrode. Store in distilled water after thoroughly rinsing, when not in use.
| Lambton College | ||
| Chemical Laboratory | ||
| Conductivity meter | Date: 28 feb, 2018 | Page 11 |
3. EQUIPMENTS
Portable field conductivity probe, conductivity meter, Standard conductivity solutions, Laboratory Control Sample, Deionized water and squirt bottle, Appropriate Field Data Sheet(s), Volumetric flask100 ml ,50 ml Funnel., Pipette, Potassium Chloride.
4. PPE
We must wear lab coat, safety googles and nitrile gloves
5. PROCEDURE
Potassium Chloride Standard Solution (KCl) 0.010 M
1. Weigh 0.746 g of KCl into a 50 ml beaker.
2. Dissolve the KCl in the beaker with de-ionised water
| Lambton College | ||
| Chemical Laboratory | ||
| Conductivity meter | Date: 28 feb, 2018 | Page 12 |
3. Pour the solution from the 50 ml beaker into a 100ml volumetric flask.
4. Thoroughly rinse the beaker contents into the flask with de-ionised water.
5. Top up to the mark and invert the flask a few more times so the solution is fully mixed.
6. Pipette carefully, 10 ml of KCl 0.100 M into 100 ml volumetric flask to make 0.010M KCl standard solution to calibrate the conductivity Meter
7. Prepare two more diluted KCl solution 0.005M, 0.001M in 100 ml volumetric glass from prepared standard KCl 0.100M.
8. Calibrate the Conductivity meter with KCl 0.01M.
9.Measure the conductivity of the different concentrations of KCl and record in the data sheet
Conductivity Meter Calibration (Orion Versa Star Pro Meter)
1. Pour Standard KCl 0.01M solution to 100 ml, clean and dry beaker.
2. Rinse the conductivity probe and stirrer DI water, dry with Kim wipe and place into the KCl standard solution
3. Press the F1 (Cal) key to start the calibration.
4. In the measurement mode more than one channel is displayed So press the ▲ or▼ key to highlight the desired channel and press the F3 to select and start.
5. The stirrer probe will start stirring when the F3 (Start) key is pressed and stop stirring when the reading stabilizes.
6. Wait so that conductivity value on the meter stabilize and perform one of the following actions:
| Lambton College | ||
| Chemical Laboratory | ||
| Conductivity meter | Date: 28 feb, 2018 | Page 13 |
a. Press the F2 (Accept) key to accept the displayed value, Conductivity of KCl 0.010 M is 1413µs/cm.
b. Or Press the F3 (Edit) key, to edit, use the numeric keypad to enter the conductivity value of the standard at the measured temperature. Press the F2 (Accept) key to confirm the entered value.
7. Press the F3 (Cal Done) key to save and end the calibration.
8. The meter will display the calibration summary and export the data to the calibration log.
9. Press the measure (Esc) key to proceed to the measurement mode. 10. Start measuring the conductivity of your solution and remember to rinse and dry the probes after each reading.
6. INTERFERENCES:
- Most problems in obtaining good data with conductivity meters are related to electrode fouling and to inadequate sample circulation.
- Conductance greater than 10,000 to 50,000 or less than10 ohms/cm may be difficult to measure; consult manufacturer’s manual. Distilled water usually measures between 0.5 to 3 ohms/cm.
- Samples and standards should be between 23 to 27 0C, unless built in temperature compensator works with wider ranges. Variations in temperatures cause greatest errors.
| Lambton College | ||
| Chemical Laboratory | ||
| Conductivity meter | Date: 28 feb, 2018 | Page 14 |
- Sources of contamination include dust, carryover and salts from hands. The probe must be washed thoroughly between samples and gloves should be worn during the procedure.
- Air bubbles trapped inside the probe will result in erratic measurements. Shake the probe to remove trapped bubbles before each measurement.
- Build-up on the conductivity cell may contaminate solution and alter conductivity reading. The cell should be cleaned as a part of regular maintenance.
7. QUALITY ASSURANCE/QUALITY CONTROL QA/QC:
- Activities will be conducted in accordance with the governing applicable documents as well as quality requirements presented in this SOP.
- each meter will be inspected daily prior to calibration.
- Avoid scratching the cells, wipe all moisture and fingerprints off the cells before inserting them into the instrument. Failure to do so can give inaccurate readings.
- Handle Sample vials from the top or by the cap to avoid fingerprints or smudges.
- After a vial has been filled with a sample and capped, the outside surface should be wiped with a clean, lint free absorbent cloth until it is dry.
- Cleaned and dried vials should be stored with the black caps on.
- The vials can be stored in the carrying case. During normal operation, you may use any typical laboratory glass cleaner along with a lint free cloth or tissue to clean the outside of the vials.
| Lambton College | ||
| Chemical Laboratory | ||
| Conductivity meter | Date: 28 feb, 2018 | Page 15 |
8. REAGENTS AND STANDARDS
- Standard potassium chloride solution, Kcl-0.0100 M solution can be purchased as a certified solution of 25.0 us/cm ± 0.3 us/cm from commercial vendors. Use of these commercially available solutions is recommended for routine operation.
- Save the certificate which accompanies the standard and note the received date and the manufacturer’s expiration date. Do not use the standards past the expiration date and dispose of any standards that are expired.
- The conductivity of reagent water should be small compared to the value being measured.
9. SAFETY
The toxicity or carcinogenicity of each reagent has not been precisely determined; however, each chemical should be regarded as a potential health hazard. Exposure to these chemicals should be reduced to the lowest possible level. Cautions are included for known extremely hazardous materials.
10. METER/PROBE STORAGE
- Between measurements and when route to and from the field, keep the probe secured in the protective sleeve on the meter face.
- Upon return to the lab, rinse probe with deionized water for the removal of particulates and water-soluble chemicals.
| Lambton College | ||
| Chemical Laboratory | ||
| Conductivity meter | Date: 28 feb, 2018 | Page 16 |
- Plug in power source to back panel of the meter to ensure a proper char
11. EDUCATION AND TRAINING
Education and training must be given on the following topics:
- hygiene requirements
- wearing and use of protective equipment and clothing;
- prevention of incidents and steps to be taken by workers in the case of incidents (biohazard incidents, chemical, electrical and fire hazards);
- good laboratory practice
- organization of work flow
- use of equipment (operation, identification of malfunctions, maintenance).
12. REFERENCES
- YSI Model 3200 Operations Manual, Revision D, YSI Incorporated, July 1998, Yellow Springs, Ohio, ITEM# 003224.
- Standard Methods for The Examination of Water and Wastewater, Method 2510-Conductivity. American Public Health Association. 21st Edition, 2005.
- Code of Federal Regulations. Protection of Environment. Section 40, Appendix B to Part 136. Definition and procedure for the determination of the method detection limit. Revised July 1, 1990.
| Lambton College | ||
| Chemical Laboratory | ||
| ISE meter | Date: 28 feb, 2018 | Page 17 |
1
INDEX
Content Page number
- Method title 18
- Scope and Application 18
- Types of ISE 18
- Principle 18
- Equipment required 18
- Analytical technique 19
- Procedure 20
- Electrode storage 22
- Electrode maintenance 22
- Troubleshooting 23
- Quality assurance / Quality control 24
- Health and safety 25
- References 26
| Lambton College | ||
| Chemical Laboratory | ||
| ISE meter | Date: 28 feb, 2018 | Page 18 |
- ISE METER
ISE stands for ion- selective electrode or also known as specific ion electrode. It is a transducer or sensor which convert the specific ion dissolved in a solution into electric potential. According to the Nernst equation, the voltage of the electricity produced is theoretically dependent on the logarithm of the ionic activity. In analytical chemistry and in biochemical/ biophysical researches, the ion- selective electrode helps to measure the ionic concentration in an aqueous solution.
2. SCOPE AND APPLICATION: Ion Selective Electrode designed to give us best in performance and reliability. ISE is used to measure ion concentration in water, food, pharmaceutical and biological materials. The main scope of the electrode technology- the various types of analytical methods are available. ISE electrode act as endpoint indicator or to perform direct measurement and incremental technique. This technique for the measurement of the ion concentration is much simpler and faster than other analytical techniques. The sample color and turbidity does not affect the measurement and also this method is applicable for lab and field use. The expanses is lower than other methods.
3. TYPES OF ISE: Glass membrane
Solis state electrode
Liquid based electrode
Compound electrode
4. PRINCIPLE: The perfect I.S.E. consists of a thin membrane in which intended ion can be transported from higher concentration to a lower concentration through a selective binding within the specific sites of the membrane which creates a potential difference for the transportation.
5. EQUIPMENT REQUIRED:
Thermo scientific Orion ISE meter
Electrode (fluoride, ammonia etc.), Magnetic stirrer
Volumetric flask, beaker and graduated cylinder
Deionized or distilled water
| Lambton College | ||
| Chemical Laboratory | ||
| ISE meter | Date: 28 feb, 2018 | Page 19 |
6. ANALYTICAL TECHNIQUE: A variety of analytical techniques are available to the analyst. The following is a description of these techniques.
Direct Calibration is a simple procedure for indicating a large number of samples. Each sample required only one-meter reading. Calibration is done by using a sequence of standards. The determination of the concentration of the sample is done by comparing the values to the standard of the sample. To maintain the similar ionic depth of the sample and the standard, the ISA is added to all the solutions.
Low Level Calibration is corresponding to the direct calibration technique. A minimum three-point calibration is suggested to remunerate for the electrode’s non-linear response at these concentrations. The best mean of manufacturing the low-level calibration standards, a special calibration standard procedure is used for the preparation.
Incremental Techniques is a technique which provide a useful method for quantifying the samples, since a calibration is not necessary. The different incremental techniques are illustrated as- in the presence of a large number of complexing agents this technique is used to measure the total concentration of a specific ion in the sample. Any applicable unit can be used in this technique as used in direct calibration.
Known Addition is used for measuring the dilute samples, probing the results of direct calibration, or measuring the total concentration of an ion in the presence of an excess complexing agent. The electrode is dipped in the sample solution and liquor of a standard solution containing the measured species is added to the sample. The actual sample concentration is measured by changing the potential after and before the addition.
Known Subtraction is beneficial as a quick version of a titration, or for measuring species in which the stable standards do not exist. One of the most important thing is to know the stoichiometric ratio between sample and the standard. An electrode observing the sample species
| Lambton College | ||
| Chemical Laboratory | ||
| ISE meter | Date: 28 feb, 2018 | Page 20 |
is used for known subtraction. Stable standards of a species are necessary which are reacting completely with the sample in a reaction of known stoichiometry.
analyte Addition is used to observe soluble solid samples, viscous samples, small or very concentrated samples, to minimize the effects of complex sample matrices, effects of varying sample temperatures. For dilute or low concentration samples this method is not convenient. Even in the presence of complexing agents, total concentration can be measured. The electrode is immersed in a standard solution containing the ion to be measured and an aliquot of the sample is added to the standard. The original sample concentration is determined from the change in potential before and after the addition.
Analyte Subtraction is used in the measurement of ions for which no ion-selective electrode exists. The electrode is immersed in that reagent solution which contains a species that the electrode senses, and that reacts with the sample. When sample size is small, or samples for which a stable standard is hard to manufacture, and for viscous or very concentrated samples this method is very useful. For the dilute samples this method is not appropriate. This is also necessary to know the stoichiometric ratio between standard and sample.
Titrations are quantitative analytical techniques for measuring the concentration of a species by cumulative addition of a reagent (titrant) that reacts with the sample species. For the determination of the titration end point, sensing electrode can be used. ISE electrode are useful as end point detectors, because the electrode is unaffected by the color of the sample or turbidity. Titrations are approximately 10 times more precise than direct calibration but are more time-consuming.
7. PROCEDURE:
A. Preparation of standard Solutions
B. Calibration Check of Electrode
a. Pipet out 25 mL of the most dilute standard solution into volumetric flask (50ml) and dilute to the mark with the TISAB. Stopper the flask and mix the solution.
b. Displaced this solution to a 100 mL plastic beaker. Put the beaker on a stirring plate, add a magnetic stirring bar and start stirring at a constant rate.
c. Connect the ISE to a pH meter and adjust the meter to the mV mode. Wash the electrode with deionized water and blot dry.
| Lambton College | ||
| Chemical Laboratory | ||
| ISE meter | Date: 28 feb, 2018 | Page 21 |
d. Lesser the electrode into the standard solution. When the reading become stable record the mV value.
e. Replay the steps 1-4 for each of the standards.
d. Measure the slope (S) from the difference in the mV readings for each factor of ten increase in the ion concentration. If your value is apart from the expected range, discuss with your lab instructor.
C. Analysis of Unknown
a. Make a standard solution of the chemical and relocate the solution into 10 mL volumetric flask and add the water into the solution up to the mark with the TISAB.
b. Pipet 50 mL of unknown sample, which contains the TISAB at the same concentration as used for the standard calibrations, into a 100 mL plastic beaker. Put the beaker on a stirring plate, add a magnetic stirring bar and start stirring at a constant rate.
c. Wash the ISE electrode with deionized water and blot dry.
d. Lesser the electrode into the unknown solution. When the reading become stable record the mV value.
e. Pipet 1 mL of the standard solution into the unknown solution. When the reading become stable record the mV value.
f. Prepare three additional 1 mL standard solution and record the mV reading after addition.
g. When finished with your recording, wash the ISE electrode with deionized water and keep it in the storage container.
D. Calculations
A. Determination of Calibration Slope
a. With the help of EXCEL, set up the mV reading for the diluted standards versus the log of the actual ion concentration of the solution.
b. Correct the data points with a linear least-squares line and from the equation for the line obtain the slope (S).
B. Determination of Unknown Concentration by Standard Addition
| Lambton College | ||
| Chemical Laboratory | ||
| ISE meter | Date: 28 feb, 2018 | Page 22 |
1. By using the slope examined in calculation, plot 10E/S (V0 + Vstd) versus CstdVstd. Recall to include the initial reading with no added standard.
2. Put the data points with a linear least-squares line and recover the equation for the line.
3. Use the equation for the line to examine the x-intercept and from this calculate the ion concentration in the unknown solution.
IV. Results
Report the ion concentration (μg/mL) in the unknown solution.
8. ELECTRODE STORAGE
Short term storage: Between measurements, wash the electrode thoroughly with distilled water and store it in a standard solution with ISA added. When achieving short term measurements, wash the electrode with distilled water and store it in a pH 4 buffer while the measurement is going on or in between the measurements. For overnight storage and storage up to one week, rinse the electrode thoroughly with distilled water and store it in a standard solution without any ISA.
Note: Erratic results are obtained when the electrode is remained expose to the air because the space inside the membrane and the inner body may be dry. To make the electrode usable again, gently pull back the cable to allow solution to flow between the inner body and the membrane.
Long term storage: For storage about one week or over the one week if the electrode is stored indefinitely, separate the electrode completely and wash the inner body, outer body and membrane cap with distilled water. Dry and restore the electrode without filling solution or a membrane.
9. ELECTRODE MAINTANENCE
If the electrode response clumps or becomes heavy, the membrane may contain a surface layer of contaminants. Restore the electrode performance by dipping the electrode in distilled water for about 5 minutes and then again dipping the electrode in a standard solution for about 1 hour. A membrane can be usable for one week to several months depending on the usage. Membrane collapse is characterized by a shift in the electrode potential, drift or poor response. Membrane breakdown may be possible on visual inspection as dark spots or discoloration of the membrane. Wash the electrode with distilled water, prepare a new membrane and assign to the Electrode Preparation section for information on investing a new membrane on the electrode.
| Lambton College | ||
| Chemical Laboratory | ||
| ISE meter | Date: 28 feb, 2018 | Page 23 |
10. TROUBLESHOOTING
Follow a systematic procedure to segregate the problem. The measuring system can be divided into four components for satisfaction in troubleshooting: meter, electrode, sample/application and technique.
Meter: The meter is the easiest element to eliminate the cause of error. Thermo Scientific Orion meters include an instrument checkout procedure and shorting cap for convenience in troubleshooting. Ask the meter user instruction for directions.
Electrode:
- Wash the electrode with distilled water.
- Certify the electrode performance by doing the procedure in the Checking Electrode Operation (Slope) section.
- If the electrode decline the procedure, rethink the Measuring Hints section. Wash the electrode as organized in the Electrode Maintenance section. Sink and refill the electrode with fresh solution.
- Reproduce the procedure in the Checking Electrode Operation (Slope) section.
- If the electrode does not work correctly, perform the procedure in the Checking the Inner Body section to examine if the inner body is working properly.
- If the electrode path the procedure in probing the Inner Body section, but determination problems persist, the sample may contain interference or complexing agents, or the technique may have error.
- Before changing wrong electrode, check this user guide and be sure to rinse the electrode, correctly make the electrode, and use the correct solution to fill, ISA and standards, carefully measure the samples and check the Troubleshooting Checklist section.
Sample/Application: The quality of results based upon the quality of the standards. Always make fresh standards when troubles comes up, it saves hours of hinder troubleshooting. Due to contamination in standards the errors occur or error may result from accuracy of dilution, or from impurities of prepared standards, accuracy of dilution, quality of distilled water, or a mathematical error in calculating the concentrations.
| Lambton College | ||
| Chemical Laboratory | ||
| ISE meter | Date: 28 feb, 2018 | Page 24 |
The best way for preparation of standards is sequential dilution. See to the Serial Dilution section. The electrode and meter may achieve with standards, but not with the sample. In this case, measure the sample composition for interferences, incompatibilities or temperature effects. Refer to the Sample Requirements, Temperature Effects and Interferences sections.
Technique: If problems resists, check the operating procedures. Review calibration and measurement sections to be sure proper technique has been followed. Verify that the expected concentration of the ion of interest is within the limit of detection of the electrode.
Check the method of analysis for compatibility with your sample. Direct measurement may not always be the method of choice. If a large amount of complexing agents are present, known addition may be the best method. If working with low level samples, follow the procedure in the Low Level Calibration section.
11. QUALITY ASSURANCE/QUALITY CONTROL
All quality control data should be maintained and available for easy reference or inspection.
–Initial Calibration Verification Standard (ICV): After performing the calibration step verify the calibration by analyzing an ICV. The ICV contains a known ion concentration near the mid-range of the calibration standards and should be from an independent source. ICV recovery must be within 90-110 %. If not, the error source must be found and corrected. An acceptable ICV must be analyzed prior to sample analysis. The ICV also serves as a laboratory control sample.
Continuing Calibration Verification Standard (CCV): After every 10 samples, and after the final sample, a CCV must be analyzed. If ISE calibration has changed, all samples analyzed since the last acceptable CCV must be re-analyzed. All samples must be bracketed between two acceptable calibration verification.
–Initial/Continuing Calibration Blank (ICB/CCB): After the ICV and after every CCV, an ICB or CCB must be analyzed using the reagent blanks. The ICB or CCB concentration must be less than the ion detection limit. If not, the contamination source must be found and corrected. All samples analyzed since the last acceptable reagent blank must be re-analyzed.
-Media Blank Spike: At least one media BS and BSD must be run with each batch of samples (not to exceed 20 samples), or with each sample matrix type to verify the accuracy and precision of the method. The spike concentration should be 5 – 10 times the detection limit and the volume added must be negligible.
| Lambton College | ||
| Chemical Laboratory | ||
| ISE meter | Date: 28 feb, 2018 | Page 25 |
Media Blank Spike percent recovery (%R) must be within 75-125% and calculated as:
Matrix Spike Recovery (%R) = SSR-SR/SAx100
Where
SSR= Spiked sample result, mg/filter
SR= Media blank result, mg/filter
SA= Spike added, mg/filter
The Relative Percent Difference (RPD) of the media BS and BSD samples should be within 20% and calculated as:
RPD= (BSR-BSDR)/(BSR+MSDR)/2 x100
Where:
BSR = %R for the media spike sample (BS) BSDR = %R for the media spike duplicate sample (BSD)
Other QC Requirement:
A linear analytical range (LAR) standard may be analyzed after calibration standards (before ICV) to determine maximum linear range of the calibration. Recovery must be within 85 – 115%. If the recovery is outside these limits, the maximum standard concentration defines the linear range. The reagent blank spike/spike duplicate recoveries must be within 75 – 125%. If recovery is outside acceptable limits, prepare and analyze an additional reagent blank spike. If the additional spike fails, investigate the source of error prior to continuing the analysis.
12. HEALTH AND SAFETY:
The toxicity or carcinogenicity of each reagent used in this method has not been precisely defined. However, each chemical compound should be treated as a potential health hazard. The laboratory is responsible for following the chemical hygiene plan and laboratory safety program regarding the safe handling of the chemicals specified in this method.
| Lambton College | ||
| Chemical Laboratory | ||
| ISE meter | Date: 28 feb, 2018 | Page 26 |
13. REFRENCES:
www.pulseinstruments.net/ionselectiveelectrodes.aspx
www.csun.edu/~hcchm003/321|/321|mise.pdf
https://clu-in.org/download/ert/1812-r00.pdf
| Lambton College | ||
| Chemical Laboratory | ||
| Turbidity meter | Date: 28 feb, 2018 | Page 27 |
INDEX
- METHOD TITLE………………………………………………………28
- SCOPE AND APPLICATION…………………………………………28
- TERMS AND DEFINITONS…………………………………………..29
- EQUIPMENTS………………………………………………………….29
- CALIBRATION…………………………………………………………30
- MEASUREMENT PROCEDURE……………………………………..31
- REAGENTS AND STANDARDS………………………………………34
- PERSONNEL…………………………………………………………….34
- QUALITY CONTROL…………………………………………………..35
- SAFETY…………………………………………………………………..36
- MAINTENANCE…………………………………………………………36
- TROUBLESHOOTING& CORRECTIVE ACTIONS………………..36
- WARRANTY…………………………………………………………….37
- EXCLUSIONS……………………………………………………………37
- REFERENCES…………………………………………………………..38
| Lambton College | ||
| Chemical Laboratory | ||
| Turbidity meter | Date: 28 feb, 2018 | Page 28 |
1.METHOD TITLE
This SOP contains data on the planning, activity and support of the Thermo Scientific Orion AQUA fast® AQ3010 turbidity meter . This client direct gives both a well ordered manual for enable you to work the waterproof AQ3010 turbidity meter and fills in as a helpful reference control .
Take after the essential guidelines contained in this SOP amid the activity, care and upkeep of the meter . It is suggested that all administrators should read this SOP before working with this meter .The data introduced in this SOP is liable to change without see as upgrades are made, and does not speak to a dedication with respect to the producer .
2. DEGREE AND APPLICATION
Turbidity is estimation of the optical property that makes light be scattered and ingested, as opposed to transmitted in straight lines through an example with no adjustment in heading. Turbidity in water is caused by suspended particulates, for example, dirt, sediment, natural and inorganic issue, green growth and different microorganisms; henceforth it is corresponding to the particulate focus and a general pointer of water quality. Nephelometers are electronic turbidity meters that yield brings about Nephelometric Turbidity Units (NTUs). NTUs are the standard units for estimating turbidity. Ensure that the turbidity meter that you are utilizing gives brings about NTUs. Relevant scope of this strategy is 0.1 – 1000 nephelometric turbidity units (NTU).
There are two universally acknowledged standard determinations for turbidity estimation. These are the worldwide standard ISO 7027 and the US EPA technique 180.1. Fundamentally the ISO 7027 is a more stringent standard and requires the utilization of a monochromatic light source. It likewise administers the outline of a turbidity meter in the accompanying territories:
Light source’s wavelength, Light sources’ ghastly transfer speed, measuring edge, Aperture edge in water test, Distance crossed by episode light and scattered light inside the example, Calibration standard
| Lambton College | ||
| Chemical Laboratory | ||
| Turbidity meter | Date: 28 feb, 2018 | Page 29 |
3. TERMS AND DEFINITIONS
Alignment. Set of methods set up by the producer to guarantee that the meter is working legitimately; a basic quality confirmation venture in meter arrangement before utilize.
Standard Solutions. The turbidimeter is provided with four fixed vial Stabilized Formazin Standards (<0.1-NTU, 20-NTU, 100-NTU, and 800NTU) and are utilized to align the turbidimeter.
NTUs. Nephelometric Turbidity Units. The units of estimation from an aligned turbidity meter alluded to as a nephelometer. Turbidity principles A turbidity standard is a fluid example or other material with a characterized and reproducible turbidity esteem. Another unit generally used to quantify turbidity is Formazin Turbidity Unit (FTU). The two units of measure of turbidity are identical:
1 NTU = 1 FTU
Material Safety Data Sheet (MSDS) – Written data gave by merchants concerning a concoction’s danger, wellbeing risks, physical properties, fire and reactivity information including capacity, spill and taking care of insurances.
4. EQUIPMENT AND MATERIALS
Conductivity Meter
Beaker 100 ml
AQUA fast AQ3010 Turbidity Meter
| Lambton College | ||
| Chemical Laboratory | ||
| Turbidity meter | Date: 28 feb, 2018 | Page 30 |
CAL 1: 800 NTU alignment standard
CAL 2: 100 NTU alignment standard
CAL 3: 20.0 NTU alignment standard
CAL 4: 0.02 NTU alignment standard
5. CALIBRATION
Turbidimeters must be legitimately aligned with an essential standard. For U.S. Ecological Protection Agency (USEPA) revealing, align in any event as frequently as required by the fitting administrative organizations. The recurrence of alignment relies upon natural conditions (dampness, temperature) and utilize. In the event that essential, adjust all the more much of the time. Record adjustment data in an alignment log book. The accompanying data ought to be gone into the UWS information section format:
turbidity standard – maker and esteem (NTU)
turbidity standard – parcel number
turbidity standard – termination date
turbidity – post adjustment perusing in standard (NTU)
The instrument ought to be industrial facility adjusted at the producer’s suggested interim.
5.1 Preparing and Filling the Calibration Standard Vials
| Lambton College | ||
| Chemical Laboratory | ||
| turbidity meter | Date: 28 feb, 2018 | Page 31 |
Before utilizing the meter out of the blue, wash within the vial with a little measure of the same NTU standard that will be utilized to fill that vial.
1. Delicately pour around 5 mL of the standard into the vial.
2. Top and whirl the vial so within the vial is completely flushed with the standard.
3. Spill the standard out of the vial.
4. Rehash stages 1 through 3.
5. Delicately empty the standard into the vial up to the blemish on the vial and top the vial.
6. Rehash this flush and filling strategy for the other three vials
5.2 CALIBRATION PROCEDURE
Before exchanging on the AQ3010 turbidity meter, an example vial must be set in the example well. You can utilize any of the alignment guidelines for this reason. In the event that an example vial isn’t put in the example well, the turbidity meter will show the Err 8 blunder message. To clear the blunder message, control off the meter., embed an example vial into the example well and power on the meter.
1. Place the AQ3010 turbidity meter on a level and level surface.
2.Press the ON/OFF key to turn on the meter. The meter goes to estimation mode after the individual test control up succession.
| Lambton College | ||
| Chemical Laboratory | ||
| turbidity meter | Date: 28 feb, 2018 | Page 32 |
3. Select the alignment capacity of the instrument by squeezing the CAL key once. The “CAL” annunciator will flicker immediately and the meter will provoke for the principal alignment standard by showing “CAL 1 800 NTU”.
4. Embed the CAL 1 standard (800 NTU) into the example well, adjusting the blemish on the vial to the arrangement stamp on the meter.
5. Press down the vial until the point when it slides completely into the instrument.
6. Cover the vial utilizing the light shield cover, if important. For some situations this isn’t required. The vial top seals the example well.
7. Press the READ/ENTER key.
8. The “CAL 1 800 NTU” annunciator will flicker for around 12 seconds while the instrument plays out the adjustment of CAL 1 point. At the point when the instrument has finished alignment for this point, it will incite you to embed the following adjustment standard into the example well ,”CAL 2 100 NTU”.
9. Rehash stages 4 through 8 for the CAL 2, CAL 3 and CAL 4 alignment norms.
10. After you effectively align the CAL 4 standard (0.02 NTU), the meter will show “STBY”.
11. The meter is presently prepared for estimation.
| Lambton College | ||
| Chemical Laboratory | ||
| Turbidity meter | Date: 28 feb, 2018 | Page 33 |
6. METHODOLOGY FOR MEASUREMENT
1. Place the AQ3010 turbidity meter on a level and level surface. Try not to grasp the meter while working it, as this may cause off base estimations
2. Place the example vial inside the example well and adjust the vial’s arrangement stamp with the meter’s arrangement check.
3. Drive the vial down until the point that it slides completely in.
4. Cover the vial utilizing the light shield cover, if essential. For some conditions this isn’t required. The vial top seals the example well.
5. Turn on the meter by squeezing the ON/OFF key.
Adjust the arrangement check on the example vial with the arrangement stamp on the AQ3010 turbidity meter and push until the point that it is completely snapped in
6. After the catalyst succession, the meter will go to the estimation mode and the show will flicker “- Rd-” around ten times.
7. The deliberate perusing will show up in the show.
8. On the off chance that important, put the second example vial into the example well. Adjust the vial arrangement stamp with the meter arrangement check.
9. Press the READ/ENTER key. The show will squint “- Rd-” a few times and estimated perusing will show up.
10. Rehash this method for the greater part of your examples .
• Never empty fluid specifically into the example well of the instrument .
| Lambton College | ||
| Chemical Laboratory | ||
| Turbidity meter | Date: 28 feb, 2018 | Page 34 |
7. REAGENTS AND STANDARDS
1. Place the AQ3010 turbidity meter on a level and level surface. Try not to grasp the meter while working it, as this may cause off base estimations
1.Primary guidelines are utilized to adjust a meter straightforwardly, or to align an auxiliary standard. Essential principles are the “best quality level” for turbidity. Formazin is the most generally adequate type of essential standard. The other is a financially made fluid suspension of Styrene divinylbenzene polymer globules (SDB). Either is adequate on the grounds that it gives repeatable outcomes.
2. Optional gauges incorporate basic cases, for example, fluid latex, SDB, or Gelex™ arrangements in a fixed example compartment. They may likewise incorporate glass poles or plates, plastic barrels, and mirror gadgets customized for use in a particular producer’s turbidimeter. These guidelines are helpful, simple to utilize, shoddy, and solid for day by day adjustment checks.
Be that as it may, to meet checking prerequisites, you should first align each auxiliary standard to an essential standard. What’s more, since the optional standard is probably going to corrupt with time, it is essential to recheck its incentive against an essential standard as required by the maker
8. PERSONNEL
Rule examiners for the Turbidity meters are required to have degrees or potentially involvement with natural or other appropriate sciences. Preparing is required for all SOPs managing water quality and amount accumulations and measurements. In-house preparing will be directed for the utilization of all meters and advanced titrators utilized for water quality or amount estimations. Examiners must be acquainted with the SOP archive and all preparation will take after the strategies laid out in that record. Additional preparation will be given when new SOPs are created. Preparing of field teams will be done through dry run practices in the research center to acquaint field groups with test accumulation, test conservation, instrument task, alignment, and.
| Lambton College | ||
| Chemical Laboratory | ||
| Turbidity meter | Date: 28 feb, 2018 | Page 35 |
upkeep. Likewise, when new work force are procured or new techniques created, qualified staff will prepare on estimation, and field investigation strategies through next to each other field trip. When preparing is viewed as sufficient, a qualified staff part will check handle staff for adherence to SOPs
9. QUALITY CONTROL
Continuously take after the producer’s guidelines with respect to alignment. A few units must be adjusted upon the arrival of the test, while others require less successive alignments. For those instruments that don’t require every day adjustment, try to institutionalize by estimating maybe a couple known benchmarks inside (or sectioning) the normal scope of the example preceding making field estimations. On the off chance that these two models don’t yield precise estimations at that point adjust the unit before really estimating any water tests. Measure a refined water field clear (<0.1 NTU) while performing field estimations. In the wake of making field estimations at that point measure maybe a couple models to decide whether the instrument has floated in its precision amid the examining time frame. Continuously record the consequences of any field spaces, institutionalization, and alignment strategies for future QA/QC reference. Record adjustment data in an alignment log book. The accompanying data ought to be gone into the UWS information section layout:
• turbidity standard – maker and esteem (NTU)
• turbidity standard – part number turbidity standard – lapse date
• turbidity – post alignment perusing in standard (NTU)
• The instrument ought to be processing plant aligned at the producer’s suggested interim.
| Lambton College | ||
| Chemical Laboratory | ||
| Turbidity meter | Date: 28 feb, 2018 | Page 36 |
11. SAFETY
Security: Use defensive eye adapt (wellbeing glasses with eye shields) and gloves. Experts ought to take after the lab’s Chemical Hygiene Plan (CHP) with laboratory garment and glasses too.
12. MAINTENANCE
The provided conveying case is ideal for ensuring the instrument. On the off chance that you don’t anticipate leaving the instrument in the provided conveying case, when it not being used guarantee that the instrument has been killed and that a perfect example vial fitted with a dark top has been set in the example well. This will guarantee that a negligible measure of clean and trash will have the capacity to settle on the optics of the instrument. Keep the light shield cover with the meter. Cleaning the vial is proficient by washing the inside and outside of the vial in a cleanser arrangement.
13. TROUBLESHOOTING AND CORRECTIVE ACTIONS
The AQ3010 turbidity meter routinely performs self-diagnostics and will naturally produce messages to give you particular indicative data. Blunder Messages Error messages demonstrate test obstructions or potentially instrumental capacity. These messages are for your utilization and don’t demonstrate a decrease in the execution of the instrument. A messy or scratched cuvet ought not be utilized. In the event that reagent water gives a perusing 0.10 unit more than the vacant compartment, at that point the water is turbid or the cell should be cleaned or disposed of. A clear perusing that is 0.03 to 0.05 units more than the void compartment isn’t uncommon. The wellspring of unnecessary foundation readings can here and there be recognized by opening the front entryway of the instrument and watching the cuvet set up.
Subsequent to investigating all segments of your estimation framework, contact Technical Support. Inside the United States call 1 .800 .225 .1480 and outside the United States call 978 .232 .6000 or fax 978 .232 .6031. For the most current contact data, visit www .thermo .com/contactwater.
| Lambton College | ||
| Chemical Laboratory | ||
| Turbidity meter | Date: 28 feb, 2018 | Page 37 |
14. WARRANTY
For the most momentum warranty data, visit www .thermo .com/water. The AQ3010 meter is provided with a 3-year guarantee from assembling deformities and adjustment principles for a half year. On the off chance that repair or change is fundamental and has not been the aftereffect of manhandle or abuse inside the assigned period, please contact Technical Support or your merchant for a RMT number. A repair expert will decide whether the item issue is because of deviations or client abuse. Out of guarantee items will be repaired on a charged premise
15. EXCLUSIONS
The instrument guarantee should not make a difference to surrenders coming about because of:
• Improper or insufficient support by client
• Unauthorized change or abuse
• Operation outside of the earth details of the items Waterproof Seal: Opening the instrument walled in area (barring the battery compartment) may void the guarantee.
| Lambton College | ||
| Chemical Laboratory | ||
| Turbidity meter | Date: 28 feb, 2018 | Page 38 |
16. REFERENCES
- EPA Publication, March 1979. “Methods for Chemical Analysis of Water and Wastes”. EPA #600/4-79-02.
- https://assets.thermofisher.com/TFS-Assets/LSG/manuals/D15881~.pdf
Cite This Work
To export a reference to this article please select a referencing stye below:
Related Services
View all


Related Content
All TagsContent relating to: "Chemistry"
Chemistry is a science involving the study of the elements and matter at the atomic and molecular level including their composition, structure, properties, behaviour, and how they react or combine.
Related Articles

DMCA / Removal Request
If you are the original writer of this dissertation and no longer wish to have your work published on the UKDiss.com website then please: